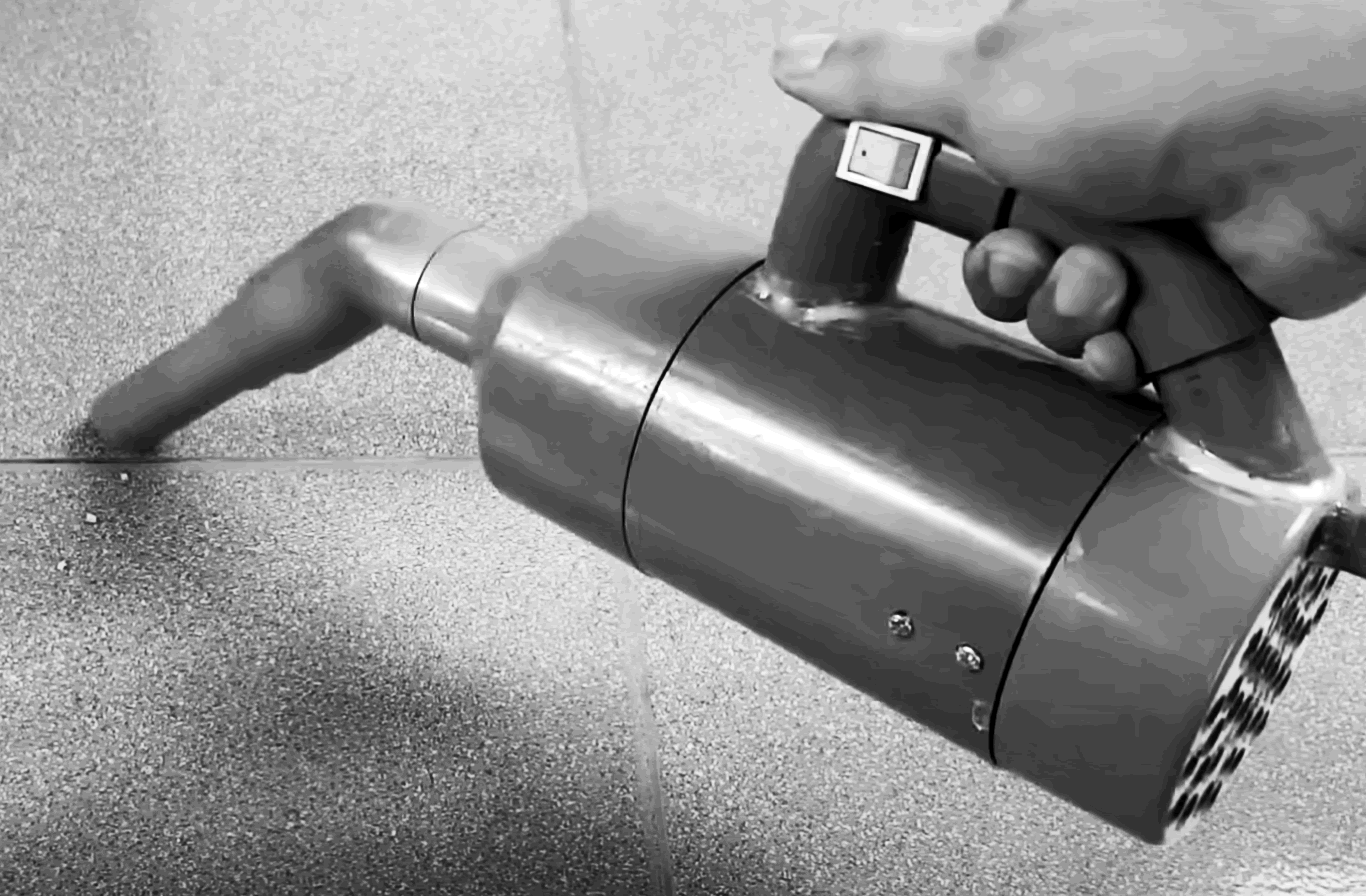
DIY: Make a Custom 775 Motor Power Vacuum Cleaner with High Pressure PVC Pipes and Fittings

Credit to ChannelCreative on Youtube
Building your own vacuum cleaner can be surprisingly effective when using high-pressure PVC fittings and a powerful DC motor like the 775. Below is a step-by-step guide using 247Garden's SCH80 PVC fittings, commonly used for high-pressure systems but perfect for this compact vacuum project.
Parts & Materials Needed
From 247Garden:
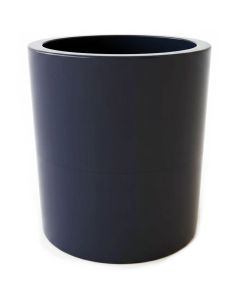
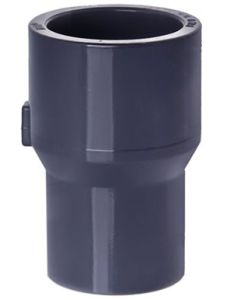
- 1x SCH80 2" Coupling (Main body housing)
- 1x SCH80 2" Cap (Base cap for airflow and stability)
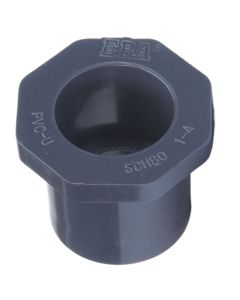
- 1x SCH80 2" to 3/4" Reducing Coupling (Top reducer for nozzle)
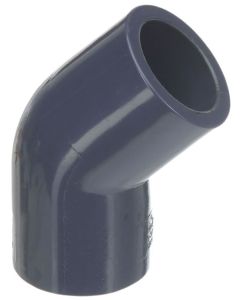
- 2x SCH80 3/4" 45-Degree Elbows (Nozzle tip and handle angle)
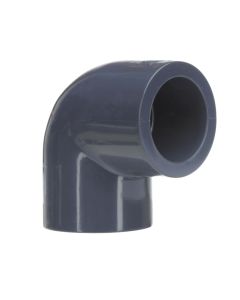
- 1x SCH80 3/4" 90-Degree Elbow (Handle bend)
- 1x SCH80 3/4" to 1/2" Reducing Coupling (Final nozzle tip reducer)
Electronics:
- 1x 775 DC Motor (12V–24V) – brushed or brushless
- 1x Fan/Impeller (matched to 775 motor shaft)
- 1x Power switch (On/Off)
- 1x Filter Bag or HEPA Filter
- Wiring, heat shrink, and soldering tools
- 12V DC Adapter for Motor
Assembly Instructions
1. Build the Vacuum Body (Center Housing)
- Use the 2" SCH80 Coupling as the central chamber of the vacuum.
- Attach the 2" SCH80 Cap at the bottom.
- Important: Drill air intake/exhaust holes evenly around the cap to allow airflow out of the motor chamber.
- Inside this coupling is where the motor, fan, and filter will be installed.
2. Create the Suction Nozzle
- At the top of the 2" coupling, connect the 2" to 3/4" SCH80 Reducing Coupling.
- Into that, insert a 3/4" 45-degree elbow, followed by the 3/4" to 1/2" reducing coupling to create a narrowed suction tip.
- This angled design concentrates airflow for stronger suction and easier reach into corners.
3. Assemble the Handle
- Use the second 3/4" 45-degree elbow and a 3/4" 90-degree elbow to make a comfortable L-shaped handle.
- Optional: Insert a short section of 3/4" SCH80 pipe between fittings to extend the handle.
- Secure the handle to the body using pipe glue or screws if needed.
4. Install the Motor and Fan
- Mount the 775 motor inside the 2" coupling, positioned vertically. Ensure:
- The fan blades face the suction tip.
- The motor is cushioned or clamped inside with vibration dampeners or a 3D-printed sleeve.
- Behind the fan, insert a filter bag or HEPA filter between the motor and base cap to catch dust before it reaches the motor.
5. Wiring the Power System
- Wire the on/off switch to the motor and power supply.
- You can mount the switch onto the handle or side of the vacuum body.
- DC adapter or equivalent battery.
- Tuck and secure wiring with heat shrink and zip ties.
6. Test and Optimize
- Power it on and test for suction.
- If airflow is weak:
- Check for air leaks.
- Ensure the fan is spinning in the correct direction.
- Make sure the filter isn’t clogged.
- For better results, refine the suction nozzle with a tighter seal or extended tapering.
Safety Tips
- Always wear safety glasses when cutting or drilling PVC.
- Ensure the motor doesn’t overheat; add ventilation or use a heat sink if necessary.
- Never use for vacuuming liquids unless sealed and filtered appropriately.
Summary of Key Fittings Used
| PVC Fitting | Purpose |
|---|---|
| 2" SCH80 Coupling | Vacuum body |
| 2" SCH80 Cap | Bottom airflow base |
| 2" to 3/4" SCH80 Reducer | Reduces body to nozzle |
| 3/4" SCH80 45° Elbow | Tip angle & handle |
| 3/4" SCH80 90° Elbow | Handle joint |
| 3/4" to 1/2" SCH80 Reducer | Final nozzle tip |
Optional Upgrades
- Add a dust chamber or removable canister.
- Use a brush attachment for cleaning upholstery.
- Mount the unit to a backpack frame for portability.
Want to get the exact fittings for this project? Check out 247Garden.com for Schedule 80 high-pressure PVC parts perfect for custom builds like this.
Let me know if you want a printable parts list or a wiring diagram!
Related Products